
Author
Using the Link Description in WordPress for Multi Line Menus
Designers aren’t cruel; sometimes, they don’t know better… I should know; I am one. If you’ve been developing for any time, you’ve run into a design concept with great ideas without a great way to implement them. In my case, I often design first and worry about coding later.
A few years ago, I ran into a situation where I wanted to have two-line navigation elements styled slightly differently. While I first thought this to be difficult, if not impossible, with WordPress, there is an easy solution.

Since the introduction of the WordPress menu system, there has been an extra, underutilized field for each menu item called “Link Description.” The link description isn’t output to the template by default; some code will change that.

Adding Link Descriptions to Your Template
The first step is of course enabling custom menu support through your theme. This can be done with the following simple code in your functions.php file:
add_action( 'init', 'threeseven_register_menus' );
function threeseven_register_menus() {
register_nav_menus(
array(
'primary-menu' => __( 'Primary Menu' )
)
);
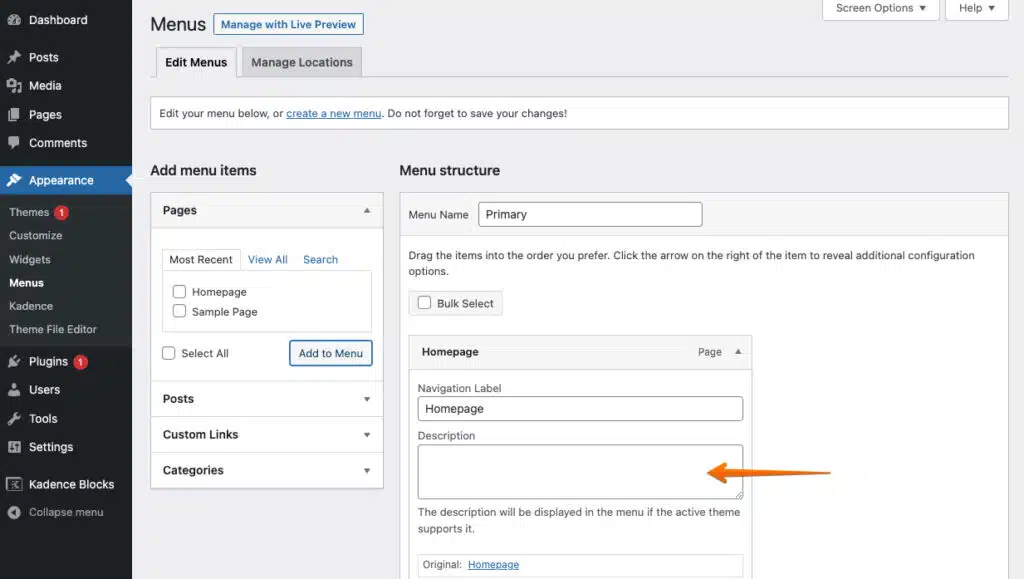
}You will then find a “Menu” link in your appearance tab within the WordPress administration interface. Once clicked on make sure that you turn on “link description” within the Screen Options.
At this point, we can now define where we would like our menu to display in our theme by adding the following function to our theme file(s):
<?php wp_nav_menu( array( 'theme_location' => 'primary-menu' ) ); ?>This will output the menu assigned to the Primary Menu location. It won’t, however output the description. To do so, we’ll need to take advantage of the WordPress Walker_Nav_Menu class.
We can do so by creating a custom class in our functions.php, such as the following:
class Linkdesc_Walker extends Walker_Nav_Menu
{
	function start_el(&$output, $item, $depth, $args) {
		global $wp_query;
		$indent = ( $depth ) ? str_repeat( "\t", $depth ) : '';

		$class_names = $value = '';

		$classes = empty( $item->classes ) ? array() : (array) $item->classes;

		$class_names = join( ' ', apply_filters( 'nav_menu_css_class', array_filter( $classes ), $item ) );
		$class_names = '';

		$output .= $indent . '<li id="menu-item-'. $item->ID . '"' . $value . 'class="'$class_names .'">';

		$attributes  = ! empty( $item->attr_title ) ? ' title="'  . esc_attr( $item->attr_title ) .'"' : '';
		$attributes .= ! empty( $item->target )     ? ' target="' . esc_attr( $item->target     ) .'"' : '';
		$attributes .= ! empty( $item->xfn )        ? ' rel="'    . esc_attr( $item->xfn        ) .'"' : '';
		$attributes .= ! empty( $item->url )        ? ' href="'   . esc_attr( $item->url        ) .'"' : '';

		$item_output = $args->before;
		$item_output .= '<a'. $attributes .'>';
		$item_output .= $args->link_before . apply_filters( 'the_title', $item->title, $item->ID ) . $args->link_after;
		$item_output .= ' <span>' . $item->description . '</span>';
		$item_output .= '</a>';
		$item_output .= $args->after;

		$output .= apply_filters( 'walker_nav_menu_start_el', $item_output, $item, $depth, $args );
	}
}
This will add the description within a span element when we tweak our template code to the following:
<?php
       $walker = new Linkdesc_Walker;
	wp_nav_menu(array(
                'theme_location' => 'primary-menu',
		'walker' => $walker
	));
?>
That’s all it takes! The link description will now be wrapped in a span after the menu title. You can tweak this to your heart’s desire by editing the $item_output lines of code.