
Author
How To Register A Conversion In Google Analytics 4 (GA4)
GA4 has a new way of tracking conversions in Analytics. It allows you to track any type of goal, not just e-commerce goals like sales and leads. It’s more powerful, but it’s also a little more complicated.
This article will explain how to register your first conversion in GA4 and set up your goals correctly.
Event-Based
In GA4 conversions are all event-based. This is different than previous versions of Analytics where you could log a conversion based on an event, but by in large they were two separate systems.
GA4 blends some capabilities of Google Tag Manager (GTM) and Google Analytics. You can now register events right in Google Analytics rather than using GTM or javascript.
Creating an Event-Based Conversion
The process can be narrowed down to two simple steps:
- Create a custom event
- Toggle it on as a conversion
Let’s look at each step in more detail.
Creating a Custom Event
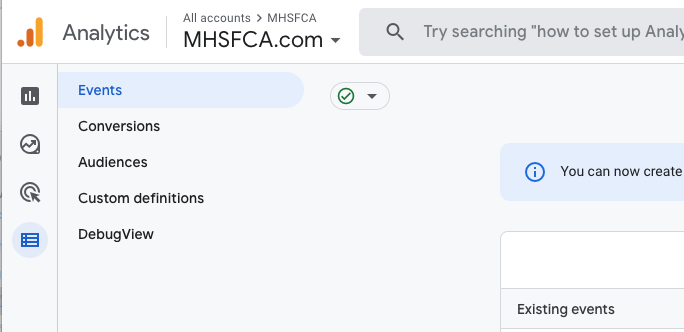
Events are managed through the Configure menu option in the left sidebar. Once selected you’ll see a handful of sub-menus the first being “Events.”
In this view, you’ll see all the default events including page_view, view_search_results, file_download, etc…
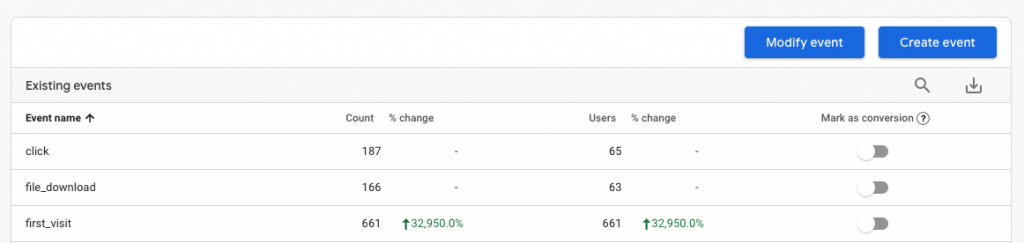
Above the events there are two buttons for “Modify Event” and “Create Event,” we’ll click “Create Event.”
This will display a list of all custom events on the property (if any exist.) Since we’re creating a new event, we’ll click “Create Event” again.
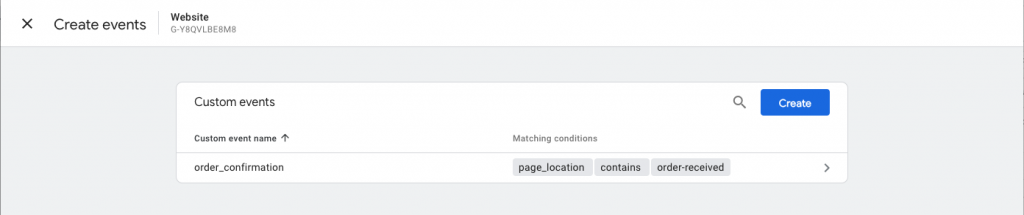
This takes up to the event configuration window where we have a few details we need to populate to register this event.
Custom event name
Each event needs a name. This is for internal reference only, and there are some minor requirements. Names need to be all lowercase and can’t contain any spaces or special characters.
What’s important is that it’s clear to you what this event is, so I recommend a descriptive name that uses underscores for spaces. In our case, we’ll name our event add_to_cart.
Matching Conditions
Google Analytics needs to know when to record this event. This all starts with the parameter which is what you’re looking at to determine yes this qualified as my event or doesn’t. The most common and easy parameter is page_location, where you’re just checking to see if a page load is at a particular location.
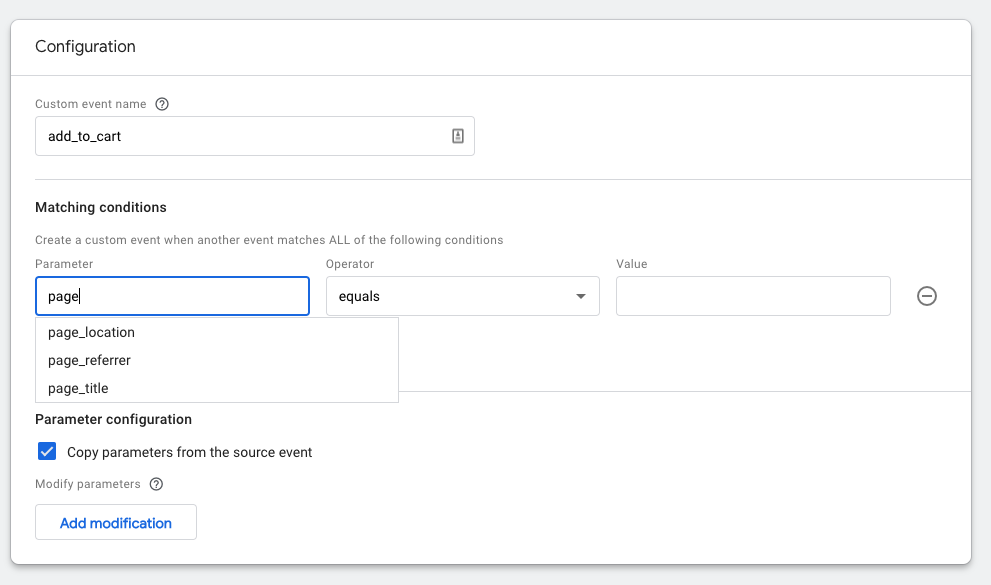
This allows you to track when users have reached an order confirmation page, add to cart page, thank you page, etc…
The next setting is the operator where you can identify how to match the parameter with the value (next.) For example, if we’ve selected page_location as our parameter does it have to be an exact match? or can the URL simply contain the value we’re checking against?
Finally, we have value which is what we’re looking for in our parameter.
In our example, we’re going to register a conversion for adding a product to your cart. Our cart page is https://www.domain.com/cart/ so we’ll use the following settings:
- Parameter: page_location
- Operator: contains
- Value: cart
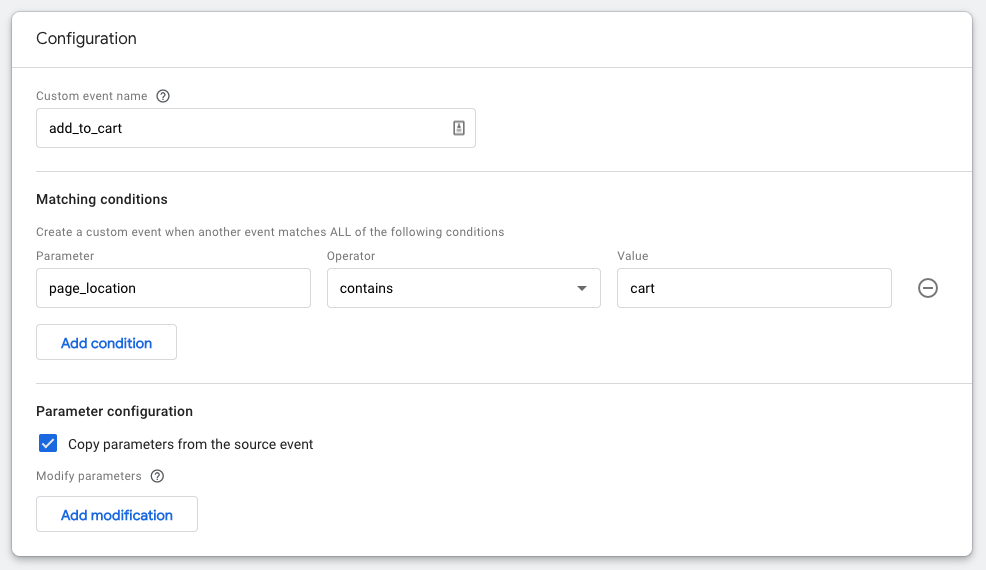
I’ve selected “contains” instead of “equals” just in case someone has a discount code that adds additional query parameters to the end of the URL, e.g. https://www.domain.com/cart/?discount=xyz
Enabling Events as Conversions
Enabling an event as a conversion is incredibly simple, there is a “Mark as Conversion” toggle for each event in our Configure > Events view.
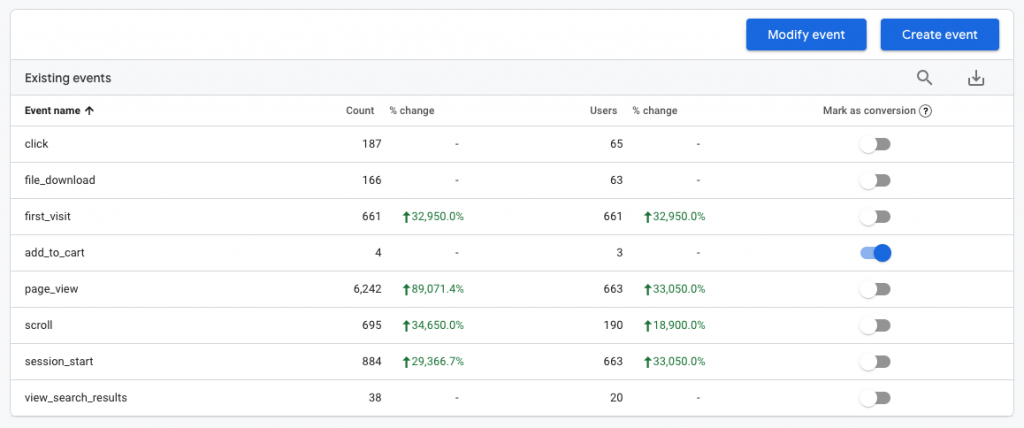
The one important caveat that I’ve run into is that your custom events don’t appear in this list right away. In my experience, it can take several hours before they appear.
Make a note to check back later and then simply flip the toggle to “Mark as conversion” when it appears.